In this article I will describe all the steps required to install a new HPE SimpliVity cluster. It will give you an idea of the prerequisites and information required during the installation.
This articles is not replacing the official HPE SimpliVity Deployment Guide. Always download the latest version of the HPE OmniStack x.x.x for vSphere Deployment Guide, since new features might be added in newer releases. This article is based on version 4.0.1.
This articles starts with the deployment of the actual nodes by using the HPE SimpliVity Deployment Manager. The prerequisites like the Arbiter and the Plug-in for vSphere client should be done in advance, and are described in other articles on this website.
Also I assume the nodes are powered on and ready to be discovered.
SimpliVity Deployment Manager
A SimpliVity cluster is deployed by using the SimpliVity Deployment Manager. This Windows based tool can be executed on Windows Server or Windows 10 host. Prerequisite for the Deployment Manager to work are .Net framework and a recent version of Java.
![]()
The installation of the Deployment Manager is a simple next-next-finish installation.
Launch the Deployment Manager by clicking the icon on the desktop
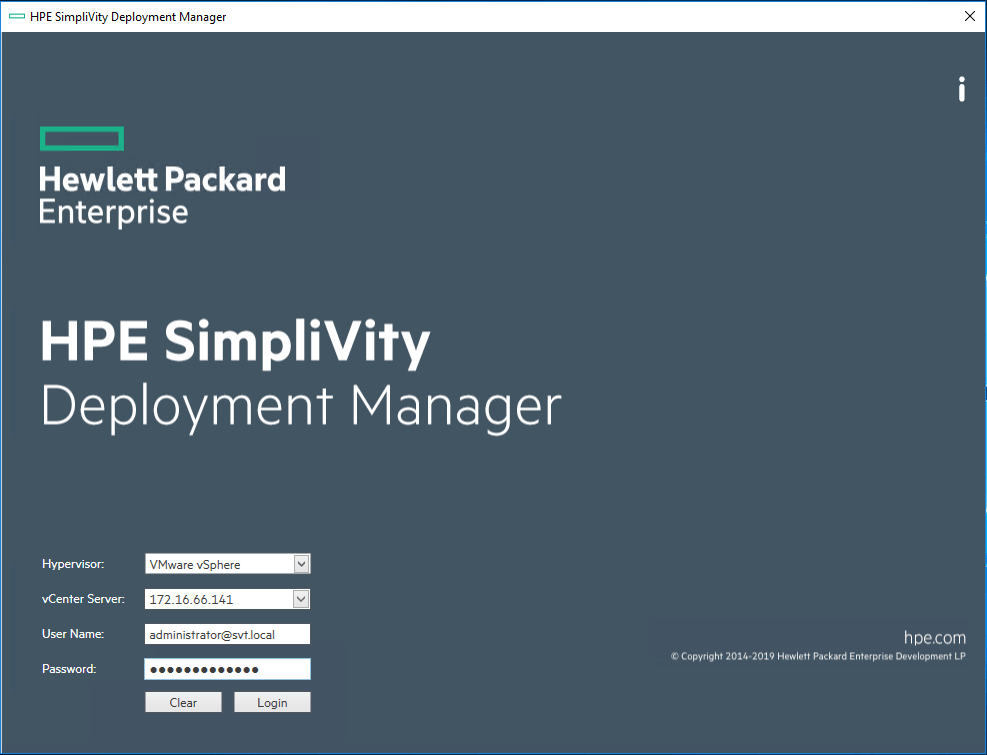
Enter all credentials for the vCenter server where you want to add the SimpliVity nodes. Be sure the vCenter plug-in is installed on the vCenter instance.
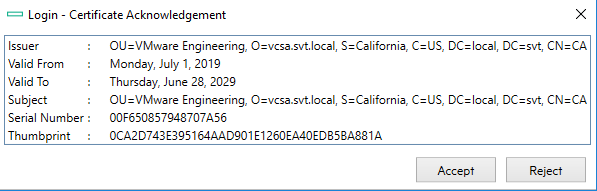
Click Accept on the certificate pop-up message
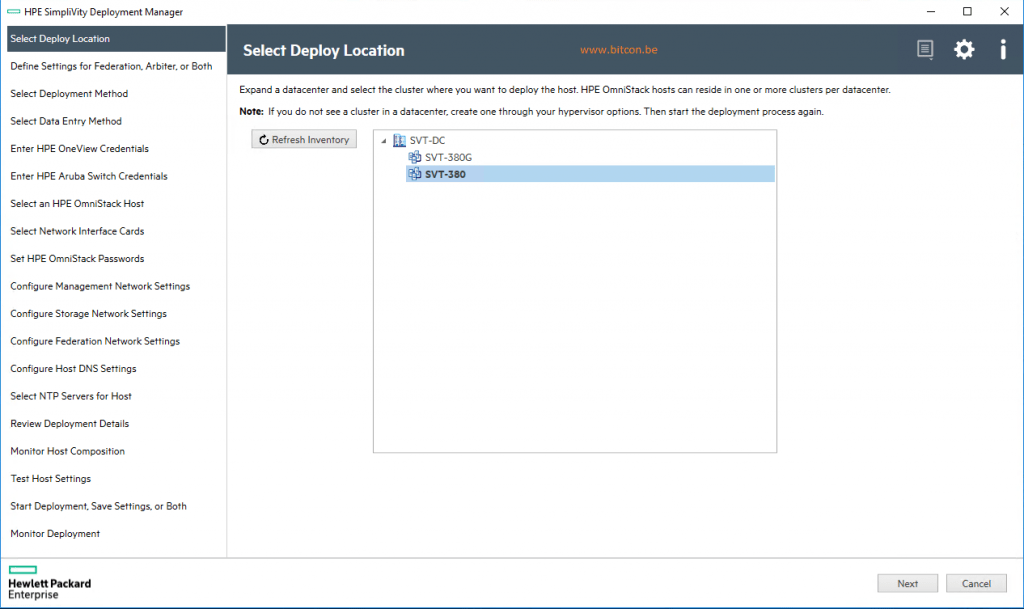
Select the appropriate cluster where you want to install the SimpliVity nodes inside vCenter.
This cluster should be created before the actual installation of SimpliVity. Important note is that HA and DRS should NOT be active at the time of the SimpliVity installation.
Click Next
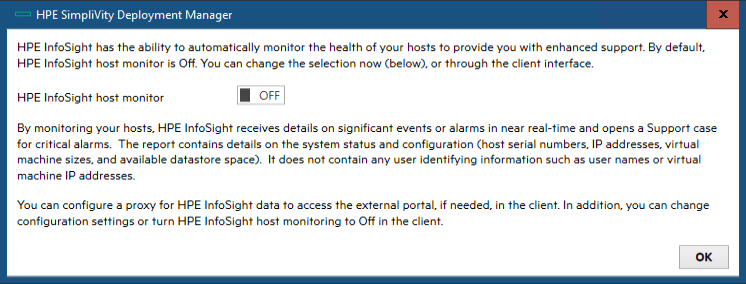
You have the choice to enable or disable HPE InfoSight for your SimplVity cluster.
Click OK
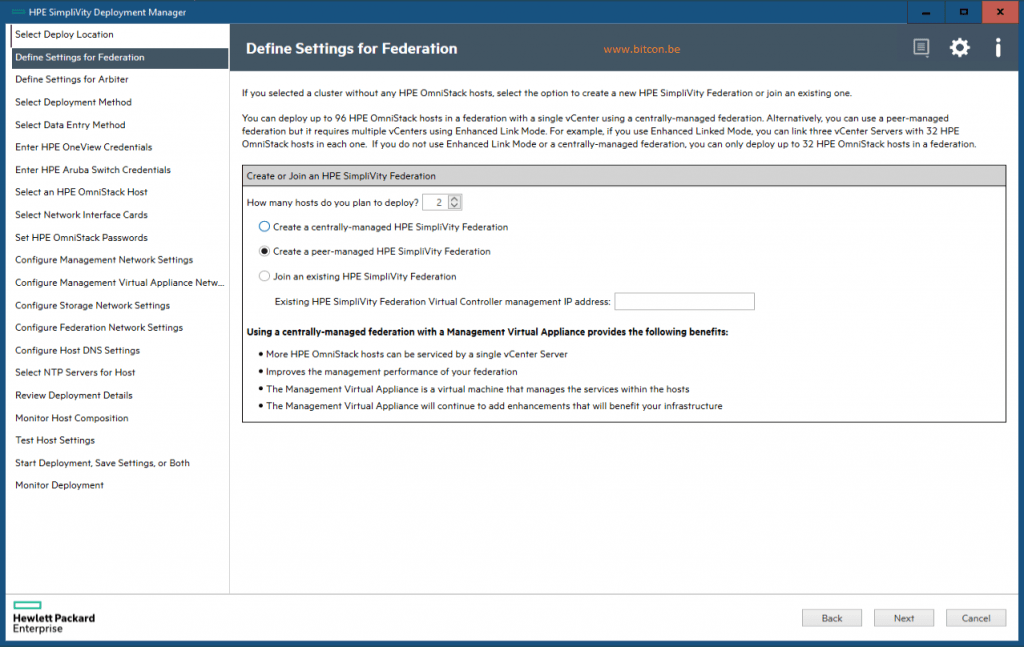
Define how many hosts you plan to deploy. If less than 10 the best practice is to use the peer-managed Federation. For larger clusters HPE suggests to use a centrally managed Federation by using the MVA Management Virtual Appliance.
You have the option to create a new Federation or join an existing Federation.
Click Next
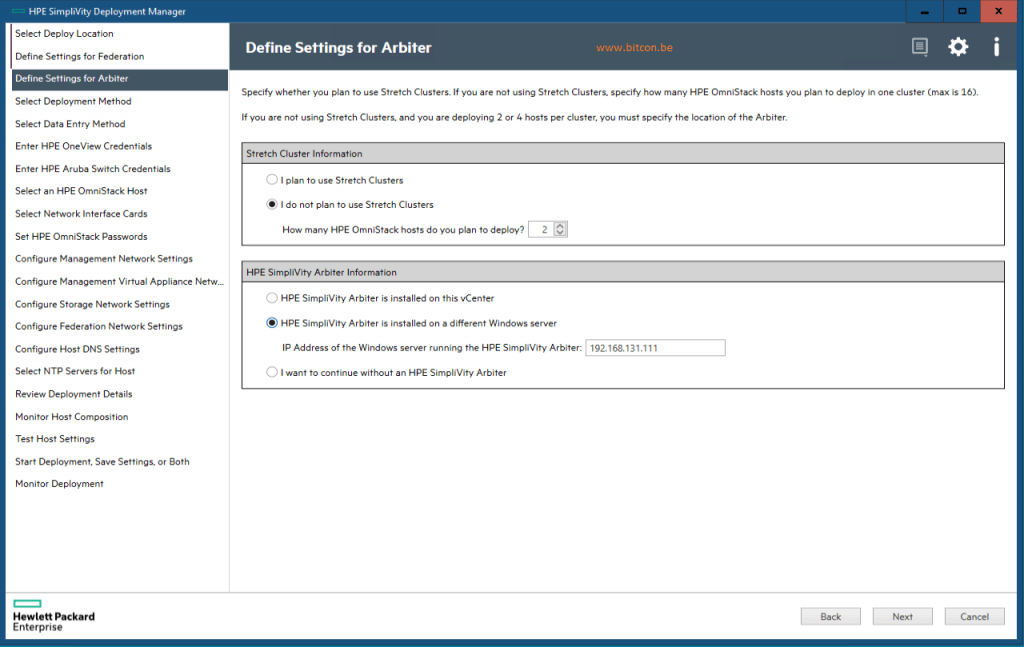
Define if you are deploying a stretched cluster or not, and how many nodes that will be in the cluster. This number will define if you need an arbiter or not. If you need an arbiter (typical in a 2-node deployment) specify the IP address where the arbiter as installed as a prerequisite.
Click Next
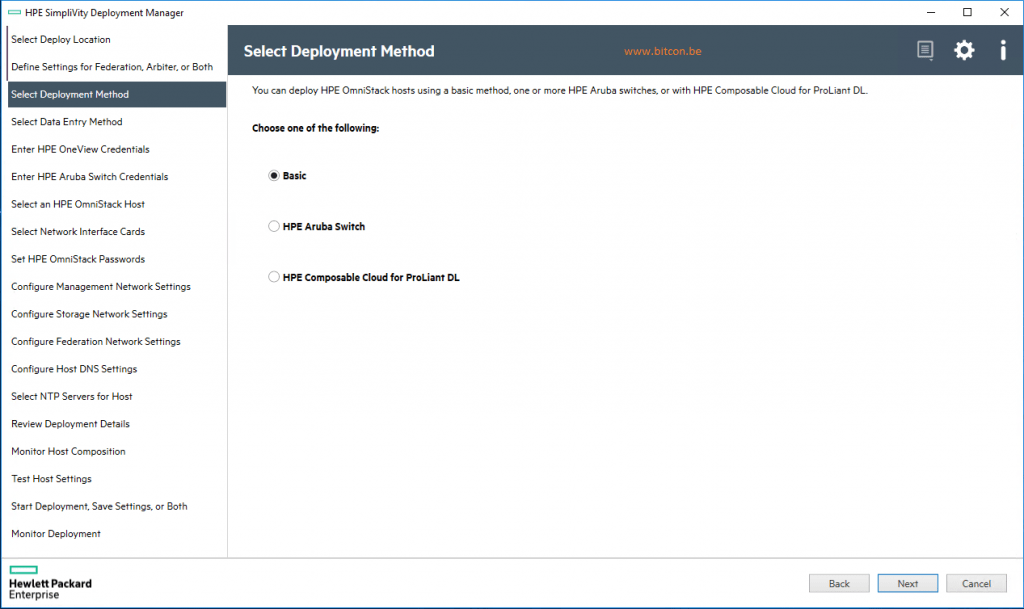
Select if you want to deploy the SimpliVity nodes or want to add additional configuration for Aruba switches or HPE Composable Cloud.
Click Next
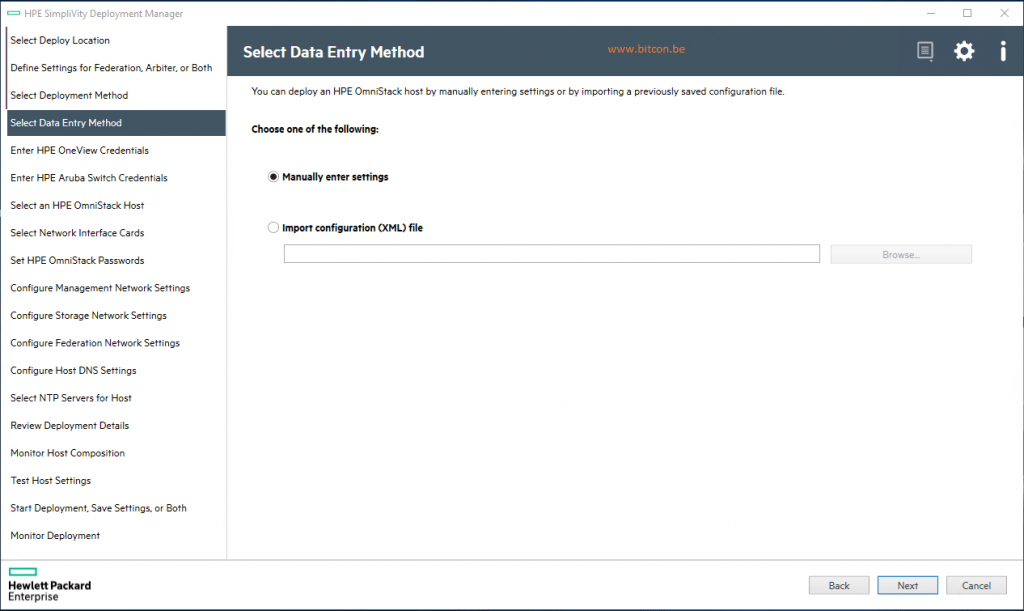
Click Next, unless you have an XML file from a previous deployment
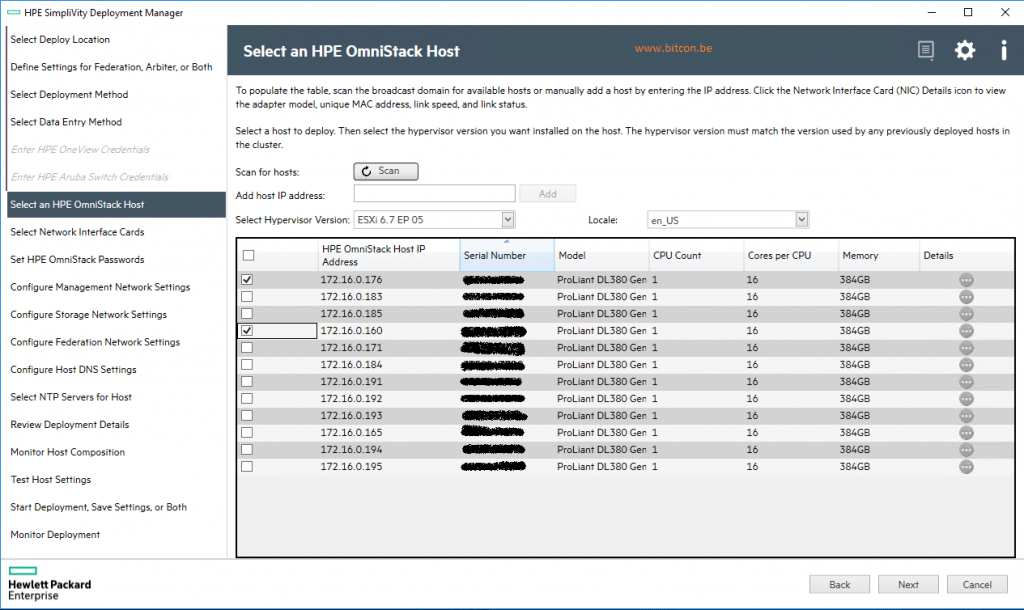
Click Scan to scan the network for existing Simplivity nodes connected and ready to be deployed. You will see the same nodes being discovered several times, this is because they are connected on the 1Gb and 10Gb interface. Every connected interface is shown.Select the correct interfaces per node to be deployed. Normally you will select a 1Gb interface for the Management NIC and a 10Gb interface for the Storage and Federation Network.
Select also the version of hypervisor you want to be deployed
In my example I select two nodes to be deployed in my cluster.
Click Next
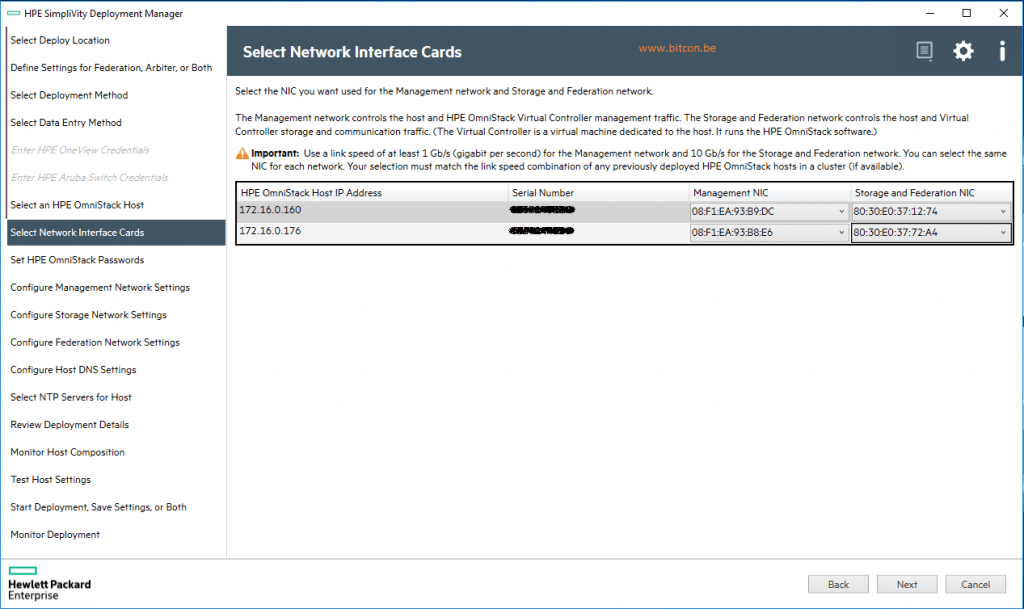
Select the correct interfaces per node to be deployed. Normally you will select a 1Gb interface for the Management NIC and a 10Gb interface for the Storage and Federation Network.
Verify that the interfaces you select are connected.
Click Next
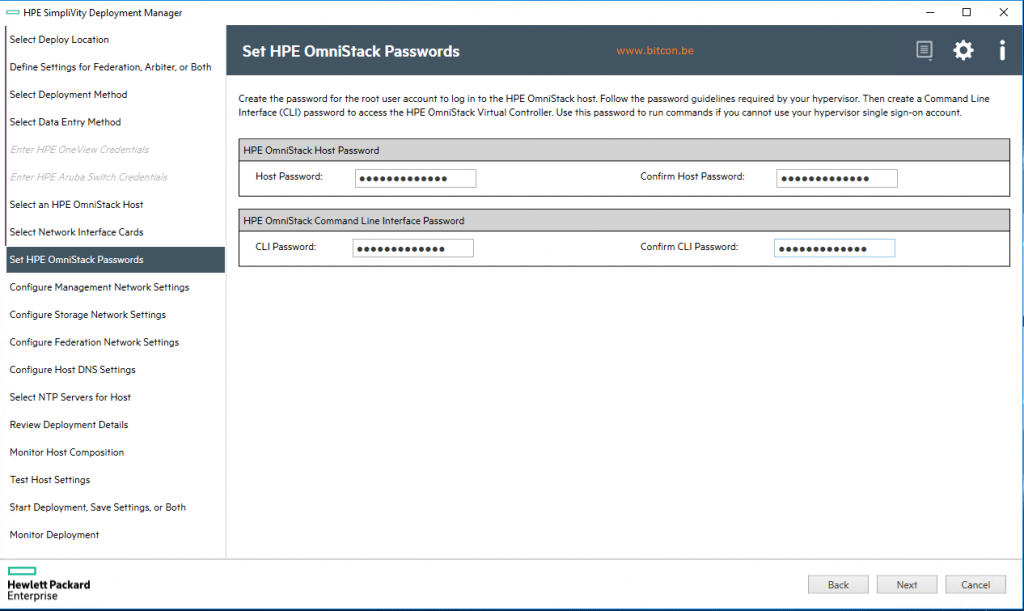
Enter the appropriate passwords for the ESXi host and the OVC CLI access.
Click Next
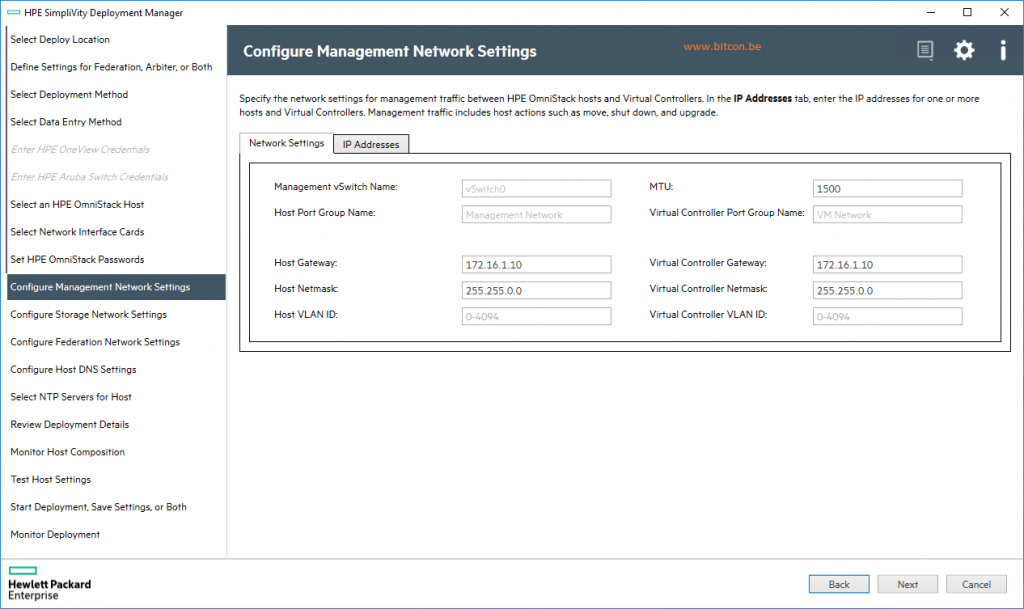

Enter the correct IP settings for the management network
Note that you need to foresee an IP address for the host and for the OVC (OmniStack Virtual Controller)
MTU size on the management network is set to the default 1500
Click Next
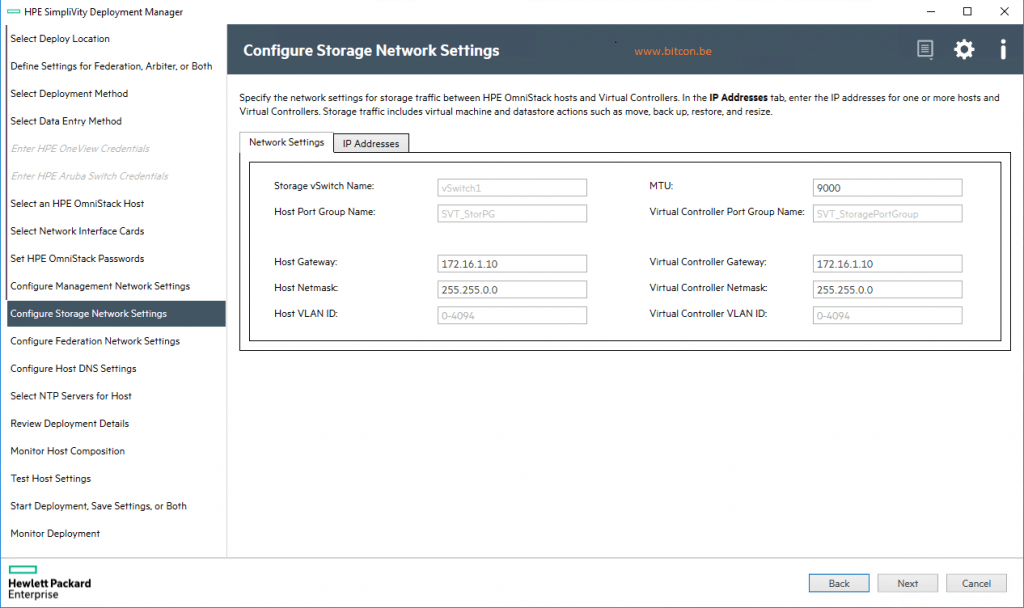

Enter the correct IP settings for the storage network
Note that you need to foresee an IP address for the host and for the OVC
MTU size on the storage network is set to the 9000 as a best practice
Click Next
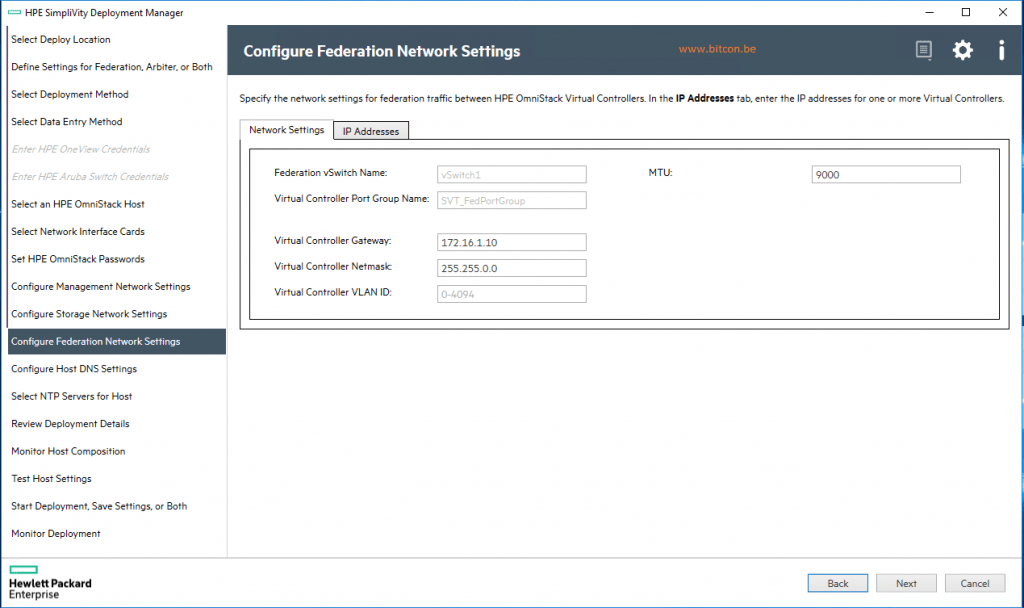

Enter the correct IP settings for the federation network
Note that you need to foresee only an IP address for the OVC on the Federation network, not the ESXi host
MTU size on the federation network is set to the 9000 as a best practice
Click Next
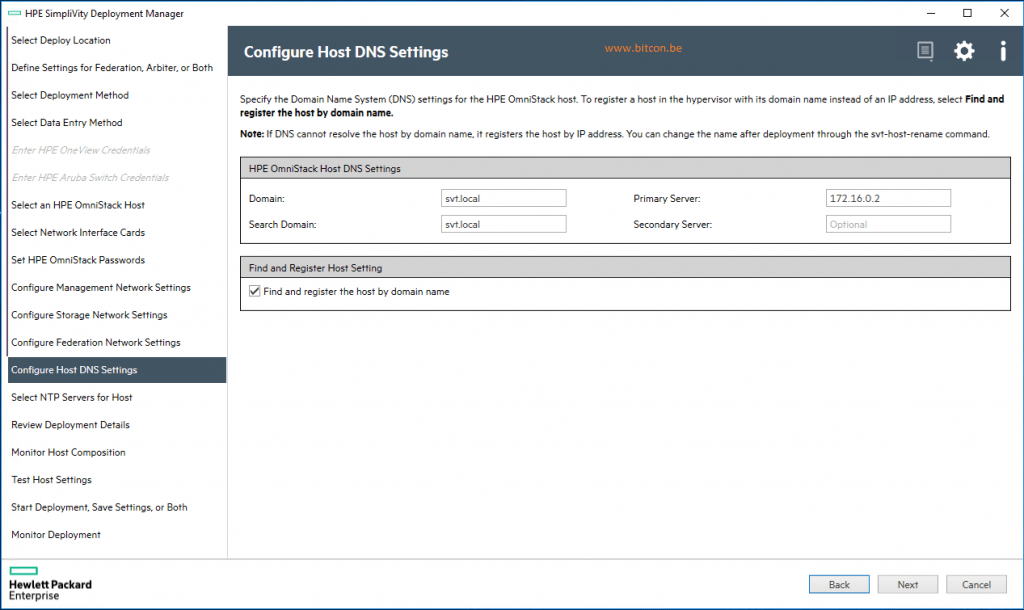
Enter the correct DNS settings
Click Next
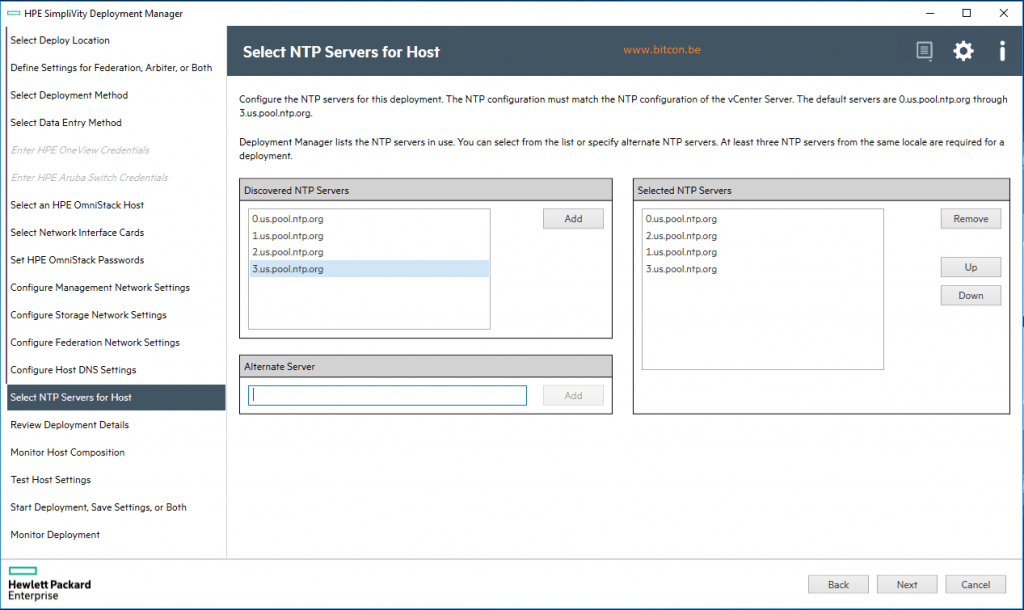
Enter the desired NTP settings
Click Next
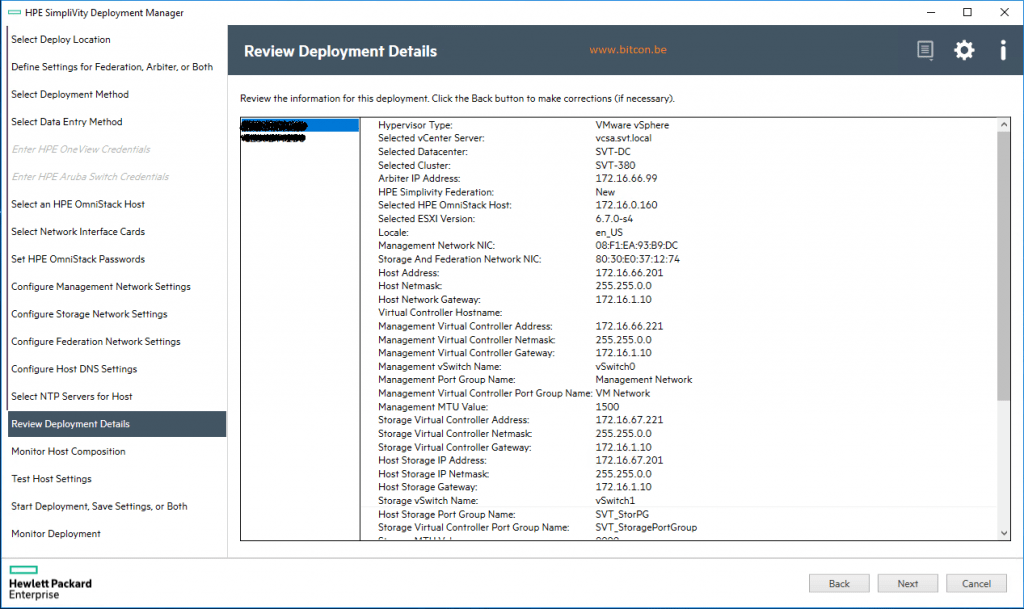
Review all details being the information entered in the previous screens
Click Next
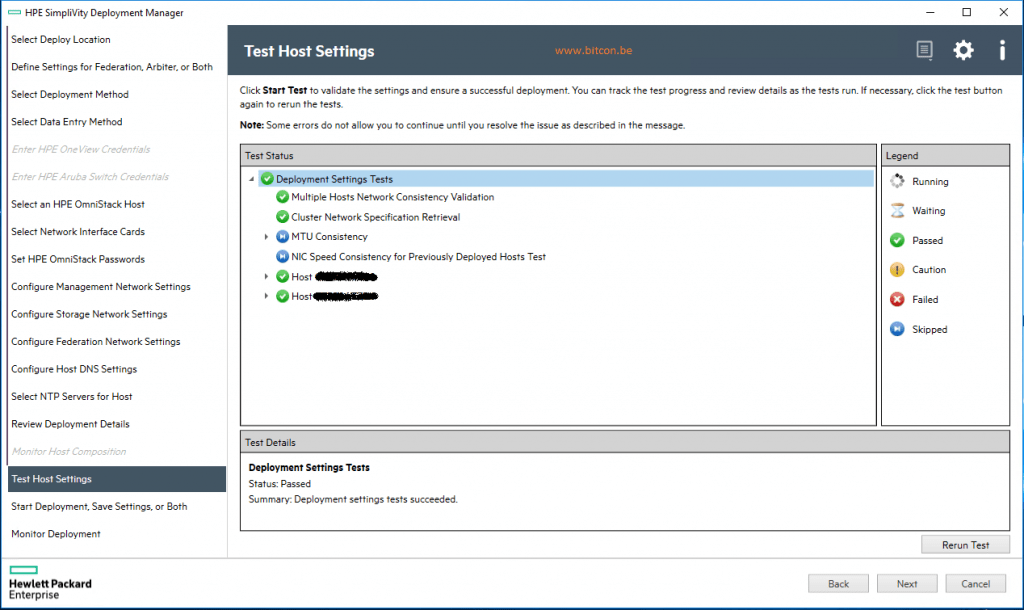
Run the test to validate all settings to ensure a successful deployment
When issues are detected, correct these issues (IP addresses, cabling issues, switch settings, …) and click Rerun Test
Click Next if all tests are green
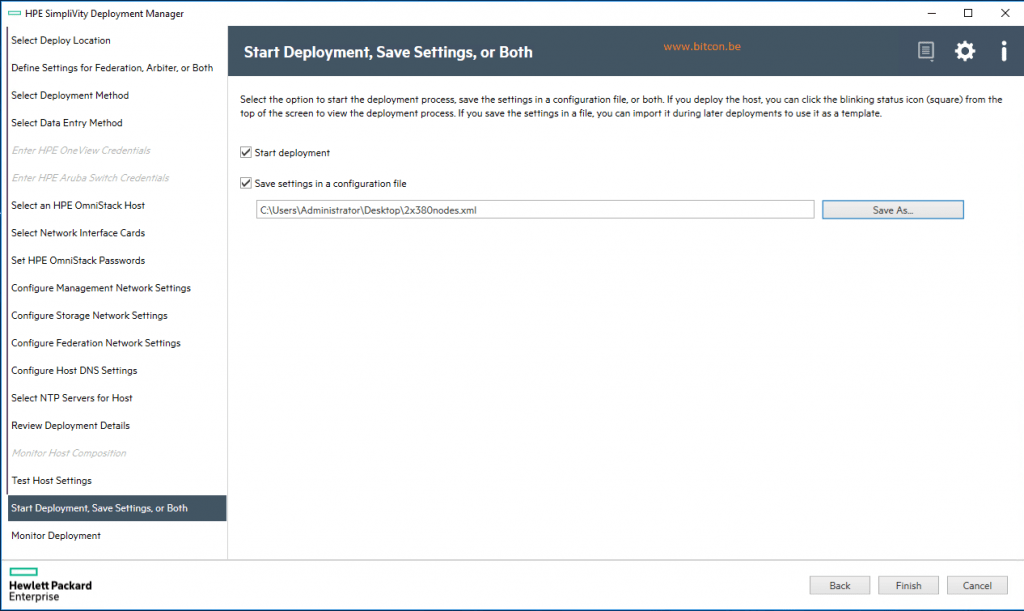
Check the Start Deployment checkbox.
To make your life easier for next deployments in the future, save the settings in an XML file which can be imported with the next deployment
Click Finish to start the deployment
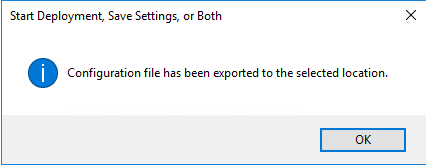
Click OK
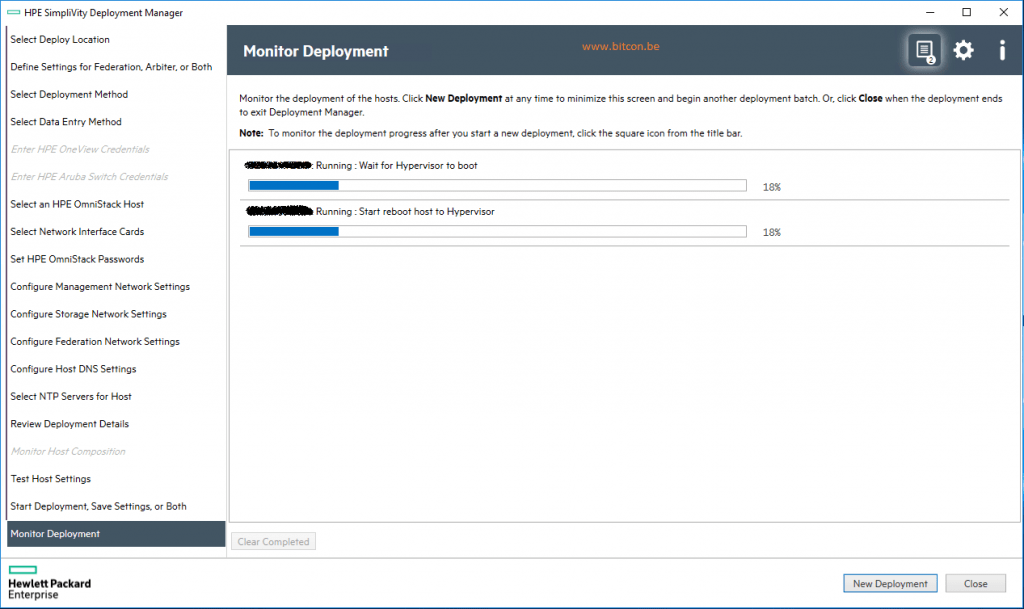
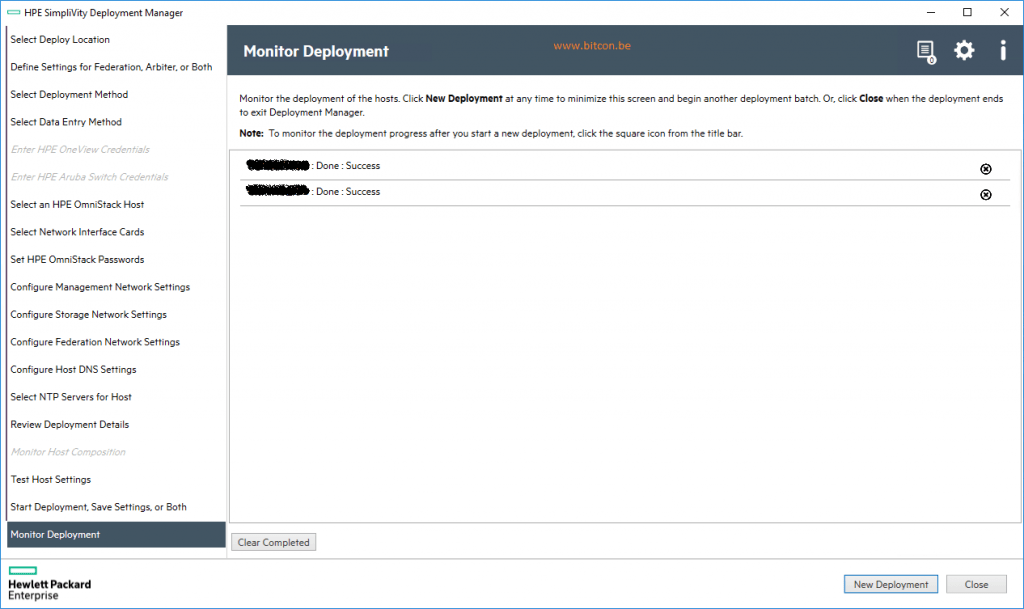
Click Close after successful deployment
Connect to the vCenter console for further configuration
This would be typically creating datastores, backup policies and deploying virtual machines.
Be social and share!