After having deployed HP OneView and created a network configuration set, now we will import enclosures and servers into OneView.
![]()
Blade enclosures will be added by connecting to their Onboard Administrator address, rack-mount servers will be discovered through its ILO.
Some important notes!
– With this version of OneView 1.0 only Gen8 BL and DL Proliant servers will be discovered / recognized.
– Also version 1.0 does not allow to import blade enclosures with an existing Virtual Connect Domain. If a Virtual Connect Domain exists in the discovered enclosure, and you force the addition to OneView, this existing domain will be deleted! Which results in downtime of the blades inside the enclosure.
– Since OneView takes over control of Virtual Connect, when navigating to the IP address of the VCM (Virtual Connect Manager) you will be automatically redirected to the OneView console.
These quite important notes makes that this initial version 1.0 is not ideal for use in existing environments. There is no formal confirmation that there will be a possibility to import existing Virtual Connect domains, although it seems to be on the roadmap… Which would make sense since I don’t see customers with a large server environment will put time in setting everything up again.
Import C7000 blade enclosure
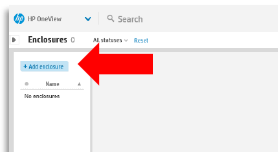
Navigate to Enclosures in the OneView console
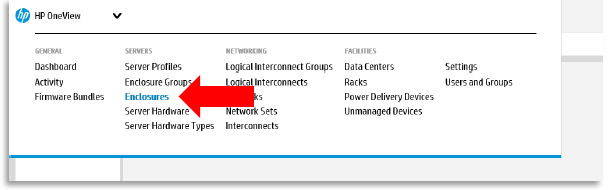
Click the Add Enclosure button
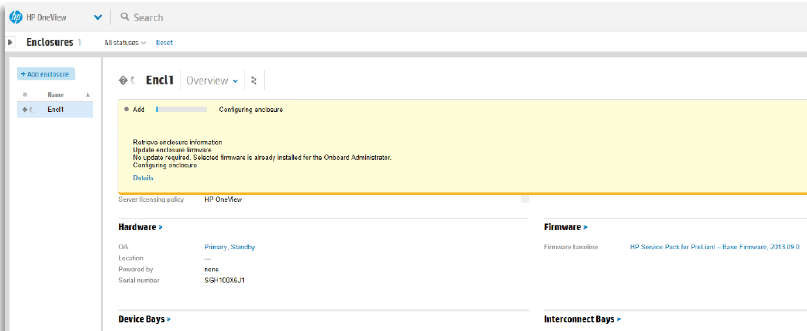
Enter the IP address or DNS name of the Onboard Administrator module of the enclosure, specify the credentials to connect to the OA, select the Enclosure Group (created before), define the License policy and specify the Firmware Baseline (defined before) to apply to this enclosure to be imported.
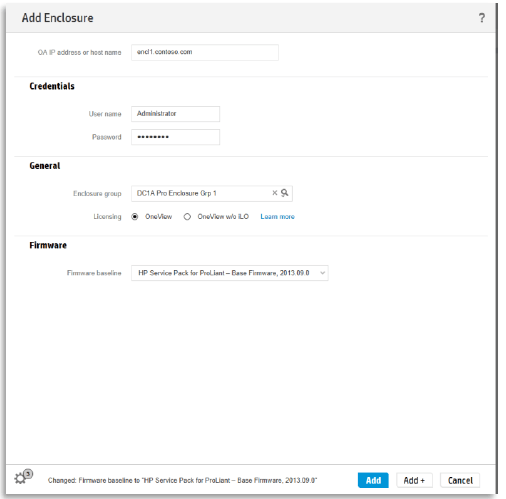
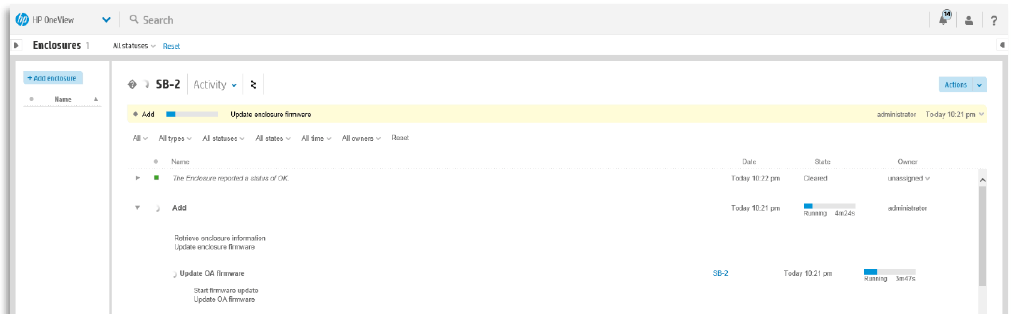
By clicking the gear icon at the bottom left of the console scree you can follow the actions that OneView executes and which changes are eventually made. This is useful for audit tracking requirements.
After a first verification the discovery and import process will be started. At this moment there is also the validation if the OA meets the minimum firmware requirements defined by the firmware baseline assigned.
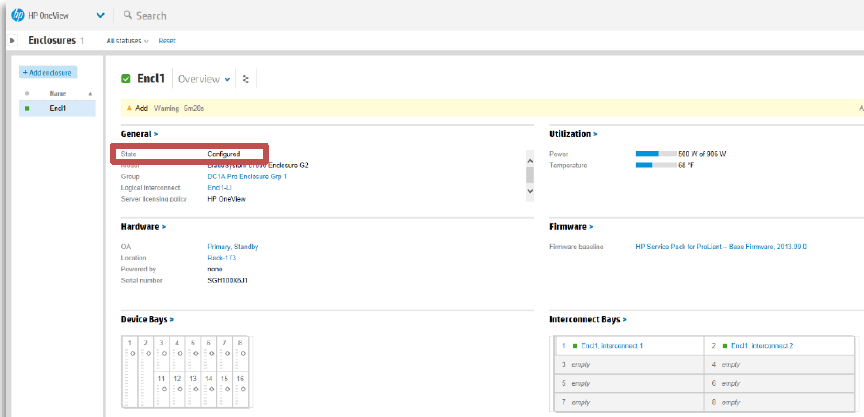
After the discovery of the OA, all Interconnect modules and server blades will be added automatically to OneView.
If the firmware of any of the components is out-of-date, sub-tasks will be created to update these components as well.
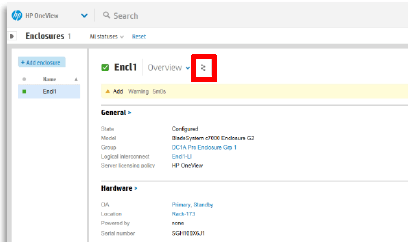
After the task has completed the Enclosure State should mention Configured.
Import Proliant DL server
OneView supports also adding Proliant Gen8 DL servers for health and alert management (only).
Discovery will be done through the ILO4 inside the server.
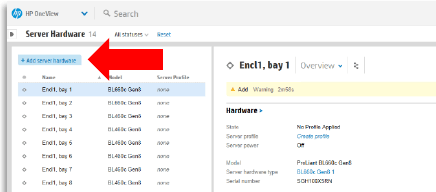
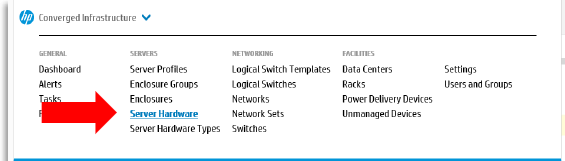
Select the Top Level menu and choose Server Hardware
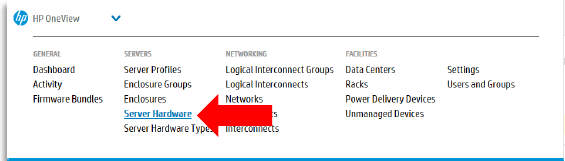
In the Server Hardware screen click the +Add Server Hardware button.
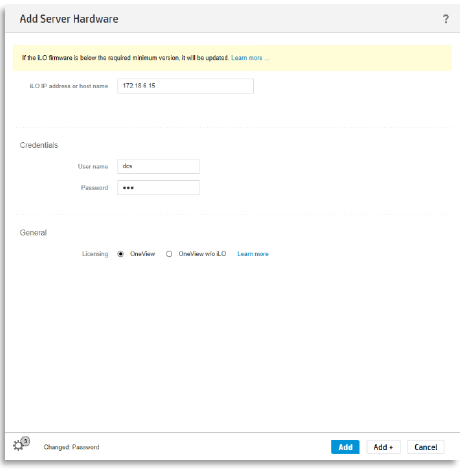
In the Add Server Hardware screen add the ILO4 IP address or FQDN together with the Administrator credentials. Click the Add button to start the discovery or click the Add+ button to continue adding other Proliant DL Gen8 servers.
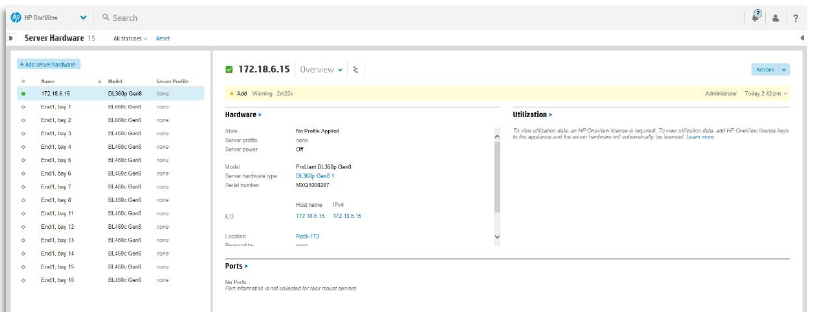
Once the server is added you can power cycle the server and launch the Remote Console from the Actions menu.
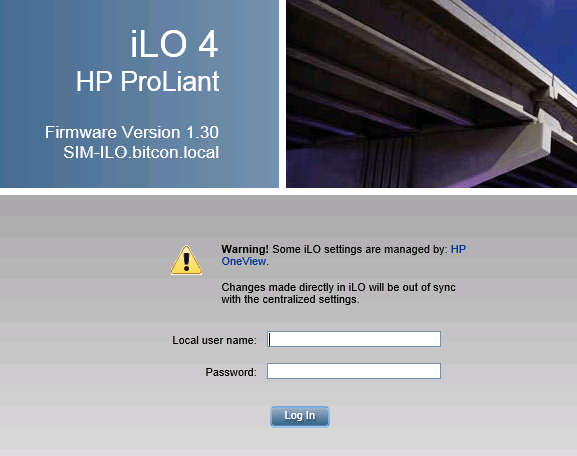
When you connect directly to the ILO console you will see the changed Logon screen.
Review the Imported Resources
First let’s check the Physical and Logical Interconnects. Select the Top Level menu and choose Interconnects.
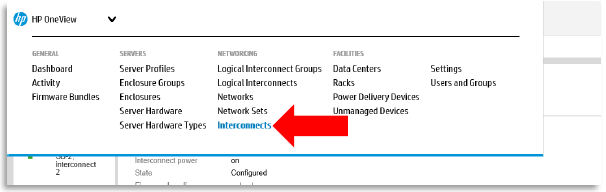
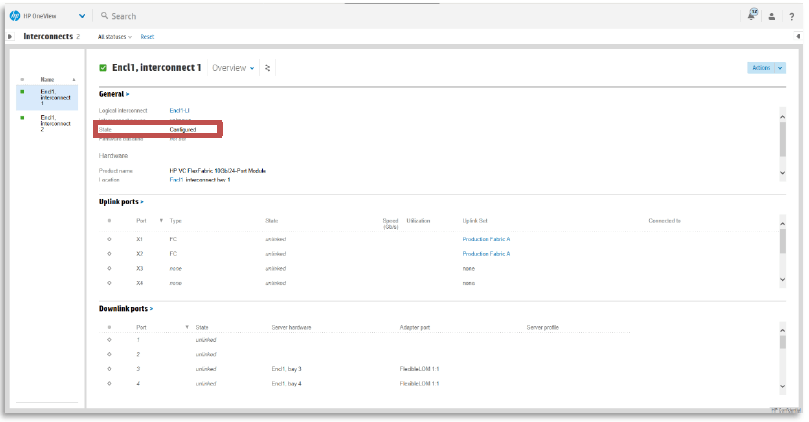
These Interconnects are actually the physical Virtual Connect Modules in the blade enclosure.
If the Virtual Connect modules meet the minimum required version they should be in a Configured State. If it does not meet the minimum firmware version, the state of the module will be Unmanaged.
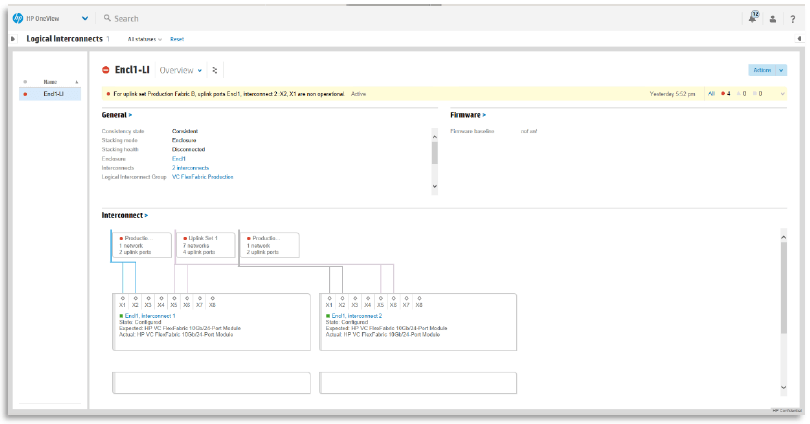
Select the Top Level menu and choose Logical Interconnects.
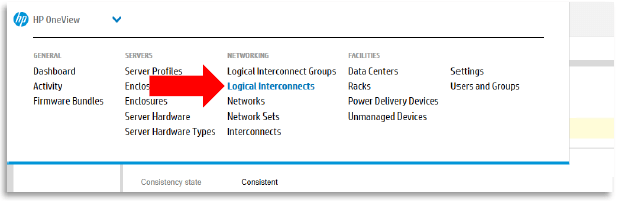
The Logical Interconnect view is how the VC modules within the enclosure are configured based on the Logical Interconnect Groups you defined earlier.
After the VC modules we check the Server Hardware.
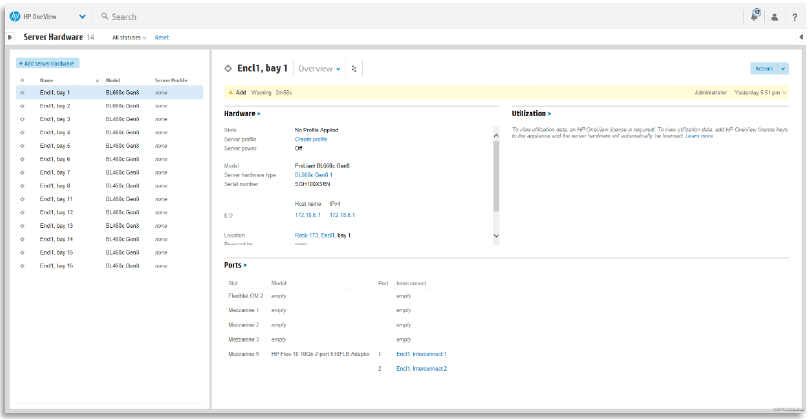
Select the Top Level menu and choose Server Hardware
You will get a list of all discovered servers listed in the left pane. In the right pane all the details will be provided of a specific server selected in the left pane.
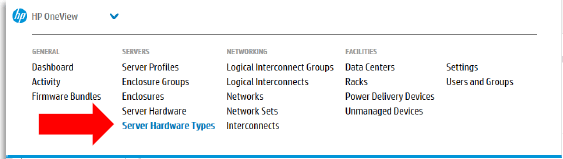
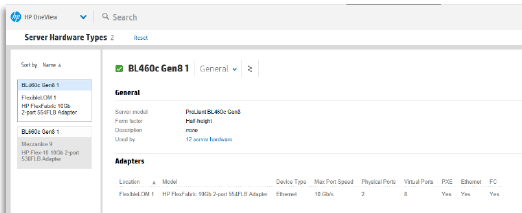
Server Hardware Types are the unique server hardware configurations discovered during the import of the enclosure. These hardware types can be used afterwards when creating hardware configurations for each server type, like adapter settings and locations, BIOS settings and firmware levels.
Select the Top Level menu and choose Server Hardware Types.
Like with HP Systems Insight Manager, OneView will also recognize and so create relationships between components like the OA and the server blades, ILO with its server and so on.
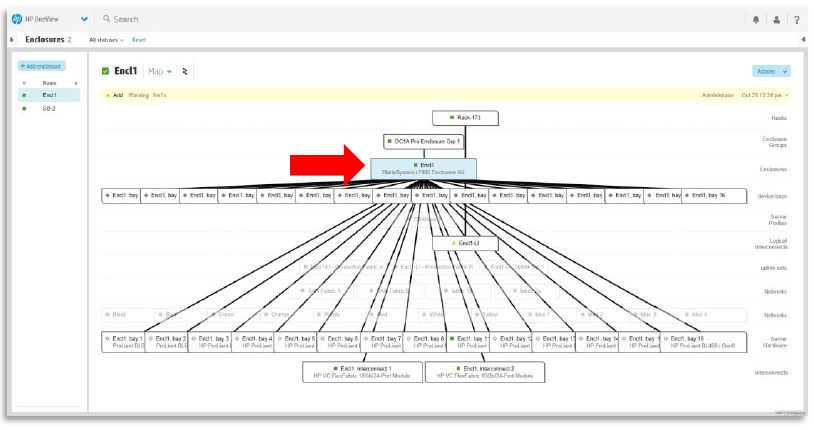
You can verify these relations in by using the Map View available in OneView.
Go to the Enclosure view and lick the Map button, or select Related from the sub-menu.
Within the Map View you can hover on all objects to see how the relationships are defined between all discovered components.
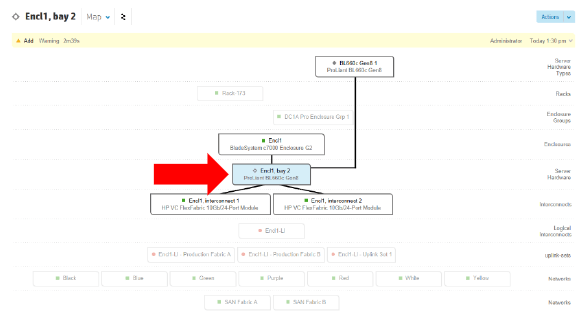
By selecting a server blade you will see its relationship with the Enclosure, Server Hardware Type and it’s connected Interconnect Bays.
This shows how easy it is to discover HP servers and blade enclosures with OneView.
In my next posts I will explain how to upgrade firmware, create server profiles and manage your complete environment with HP OneView.